> For the complete documentation index, see [llms.txt](https://apidocs.arionbanki.is/llms.txt). Markdown versions of documentation pages are available by appending `.md` to page URLs; this page is available as [Markdown](https://apidocs.arionbanki.is/psd2/getting-started/setting-up-sandbox.md).
# Setting Up Sandbox
## Getting Started
TPP - Quick Onboarding registration
Login/Register to the Arion WebPortal
Go to and click "Get Started"
After you've successfully logged in, fill in your information:
Now you need to go to registered developer's email and confirm it
After you've confirmed your email you will get a notification like this and you'll be redirected to the main page to create your first application
Click "Add Application"
Enter the name of your Application
Enter a public description of your Application
Enter the redirectUri of your Application
Then hit the "Next Step" button
After that you'll have to select your product, in this case the Arion Sandbox.
Click "Next Step"
Next fill out your company details
*please note: eIDAS identifer and the QWAC Certificate fields are not need untill you hit the GoLive button*
Click "Next Step"
Attention! On the next screen you will see your client secret. You will only see this once and never again so please make note of it and store is somewhere safe.
*( if you loose this secret in the future, there is an option to re-generate the client )*
Next please confirm the final registration by confirming the email sent do the registered company ( the TPP ) you entered previously
After that you'll be enrolled in our PSD Sandbox, and you'll see the app details, e.g. ApiKey, ClienId and the scopes your App has access to.
You will use this data in your code to connect to Arion's OpenBanking services, along side with the Client Secret you noted and stored earlier.
Next head into the Data menu and create your Users
Hit "Add User" - then select your newly created user in the grid to generate data for him/her
To create data for that user, hit "Create Account":
Your newly created test data will be displayed:
Next you need to generate a token. For the Sandbox, it's possible to do that by hitting the "..." for your application and selecting "Create Token"
This token will be used to connect to our OpenBanking Api services:
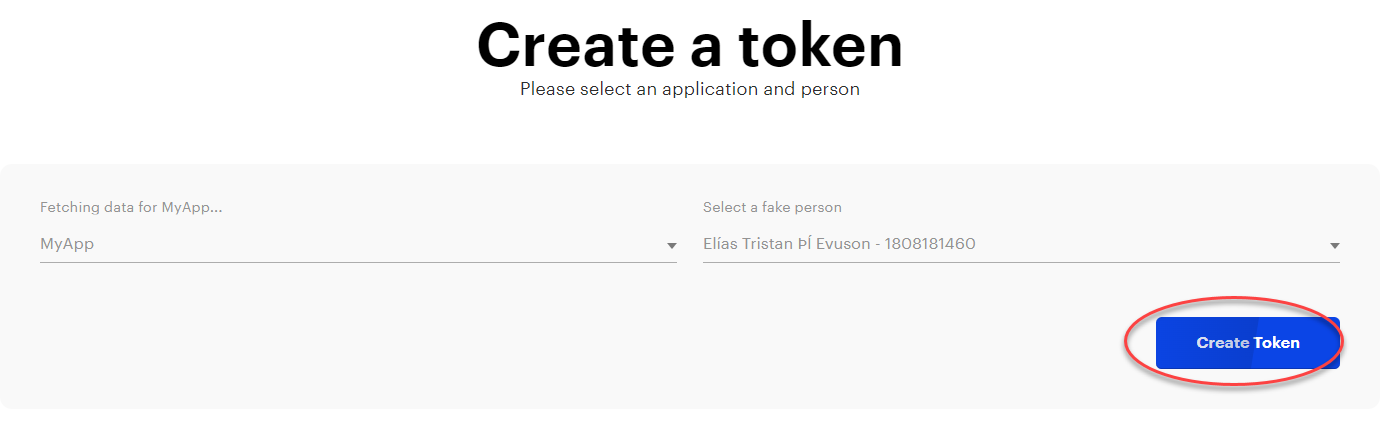
Select your App and the person you want to generate a token for. If you've created multiple users, you will get multiple users from this dropdown. If not, you'll only see one user.
Click "Create Token" tok get your OpenId token to use in your client for our OpenBanking services
Your token will be created and you can copy the value to use in your application, and set it as bearer in the HTTP header of your application:
( please note this token will only be displayed once in this page - you can however create a new token anytime you like)
As your first request, we recommend creating a consent.
In the PSD2 directive consents are prerequisite to access account balances and transactions
Later when calling the Accounts endpoints you use the id which you get back when creating a consent.
These are the parameters required to create a valid consent, which you then need to confirm before calling our OpenBanking Apis:
1. X-Request-ID header - Valid UUID
2. PSU-ID header - Valid kennitala of the natural or legal person making use of a payment service - the user which you get from our Openbanking WebPortal
3. Ocp-Apim-Subscription-Key header - API key which you get from our Openbanking WebPortal
4. PSU-IP-Address header - Valid IP Address
5. Authorization header - Valid Access token which you get from our Openbanking WebPortal
{% hint style="info" %}
Note that you must follow the SCA Redirect link and confirm the consent before using it
{% endhint %}
For more detail in making your first request, check out our guides to set up our sample clients:
{% content-ref url="/pages/ZPpmyFXBpR64vSY5K4Md" %}
[Sample Clients](/psd2/api-reference/sample-clients.md)
{% endcontent-ref %}
For more detail on the API spec, look at our API Specification:
{% content-ref url="/pages/w9n9DIv3nc0xLGszvLCw" %}
[Broken mention](broken://pages/w9n9DIv3nc0xLGszvLCw)
{% endcontent-ref %}